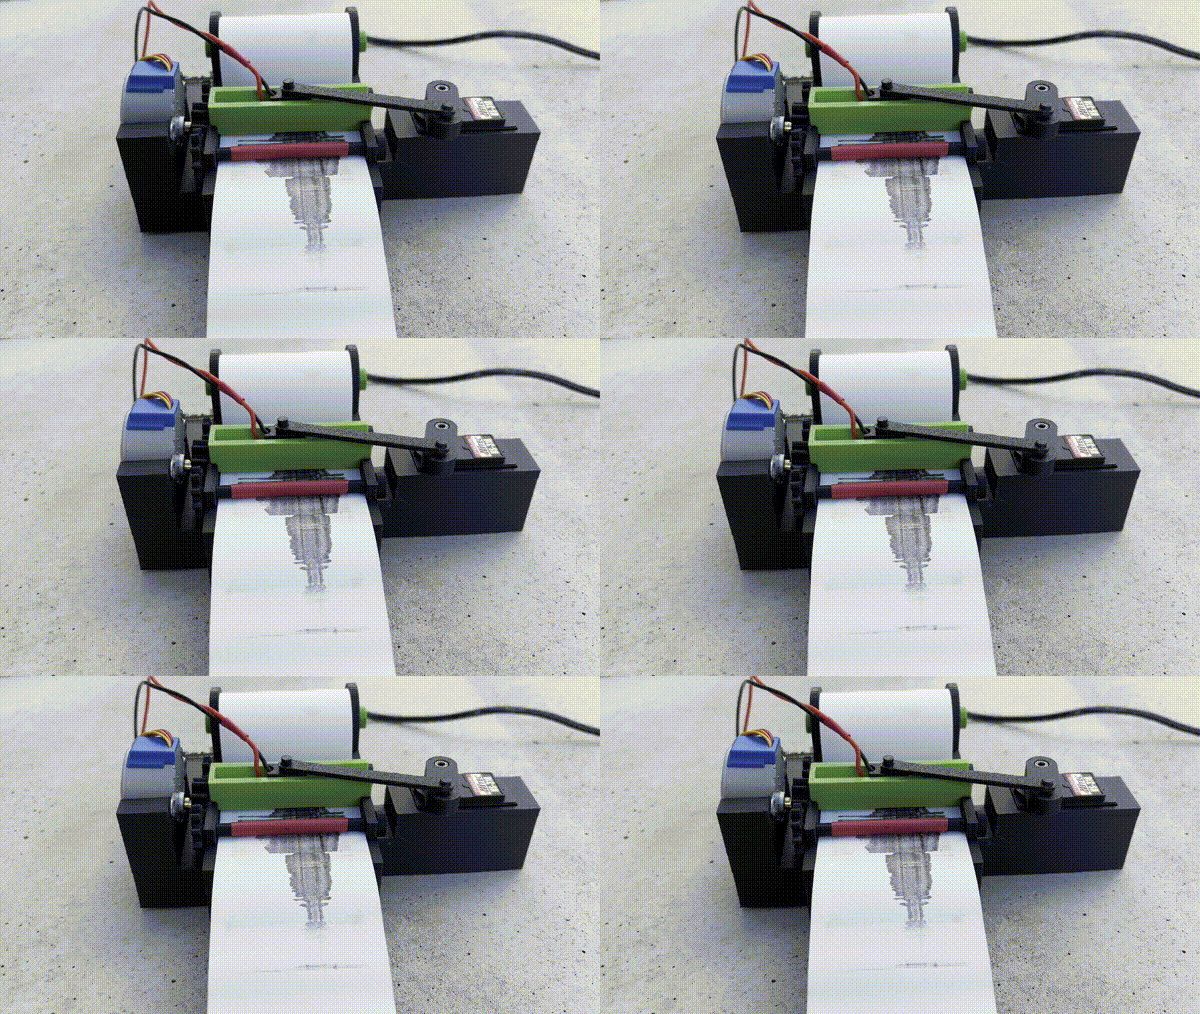
I designed this timepiece to measure the intensity of light and graph that value over time using heat to mark thermal paper. My inspiration came scientific instruments like seismographs. I chose to use sunlight because it is our fundamental measure of time passing. Heat is related to sunlight, but heat is also used to measure the passage of time of our expanding universe.
This pseudoscientific device plays with these themes.
Process
The first step was to get a reading from the Lux sensor. I chose to use this sensor over a simple photo resistor or transistor because it is more accurate and faster, it would be able to get the subtle changes in light as a cloud passes by.

I experimented with the motors, making a sketch of each motor board so I had options for engineering the mechanics. My code for those experiments is documented here.
The wanted to use the servo motor for tracing the light reading from the lux sensor. I wrote a sketch that would translate the intensity of light to movement of the motor. The motor would centered at 90˚, then move a given amount +/- that center point. When the light was most intense it would sweep from 90˚ to 180˚ the to 0˚ and settle back at 90˚ for the next reading.
I needed to figure out how to make the rotational movement of the servo motor translate to linear motion. I found this example on Printables and modeled parts of my mechanism off of it.

I also wanted the make sure the distance travelled did not exceed the width of the thermal paper. ChatGPT helped me out with the math, which ended up being pretty simple. The relationship between radius and linear distance is $2r = L$. So with a travel distance of 48mm, the arm length would need to be 24mm. The length of the crank arm does not affect the distance travelled, but it does affect the smoothness. The crank arm should be two to three times longer than the radius, I made my 60mm.

I created a testing rig to confirm that math and test the movement. With some trial and error I was able to get the setup I needed.
I also needed to a mechanism to pull the paper through the apparatus. Originally I intended to use a dc motor and use PWM to drive it at a low speed. I used Rhino/Grasshopper to create the gears. There is a library called PlantHopper that makes this very easy. I follow this Parametric House tutorial to get started.

When I put it in the prototype rig I realized it didn’t have enough torque to move the gears at a low speed. So I switched to stepper motor to get the results that I wanted.
Final Build
Once I had an idea of how the everything would come together. I used Rhino to create an enclosure that help the motors, gears, and paper in class. Modeling this took a lot of time.

I soldered together the circuit so it would be more stable in the enclosure.

Here is the final soldered circuit. I used header pins to be able to easily detach the motors and microcontroller.

The enclosure hid the components in the back compartment.

The heating element was the most difficult engineering. I model the piece to slide through the track with a gap for the resistor. I cut a small piece of protoboard to isolate the hot resistor from melting the plastic. I modeled channels into the head to hold the wires.

Here is the final assembly.

The device worked as planned. I had the perfect day for testing it; clouds quick passing in in front of the sun, varying the intensity of light.

After about an hour of operating, the heater caught on the paper and jammed. The 3d printed enclosure didn't take well to the heater head and melted some around where it was stuck. The heater cold no longer move smoothly across the paper and failed.
Conclusion
Obviously there is plenty to work on in terms of engineering hear. I like the concept and want to continue working in it.
Also, I would like the whole system to be solar powered, this would "close the loop" of the whole concept by having the light literally power the device.